


| By: Paul S. Cilwa | Viewed: 4/23/2024 Posted: 9/1/2017 |
Page Views: 3987 | |
| Topics: #Music #Ripping #Polishing #TaggingDigitalAudioFiles #MP3tag #MP3wav | |||
| How to use a free applet to add song titles, artists, comments, cover art, and more to your digital audio tracks. | |||
A rose by any other name might smell as sweet, but it's a lot easier to find if it's grouped with "flowers beginning with 'R'". The same goes for your MP3s. You want to name them in such a way that you can find them later. Even though you'll be using your Windows Media Player (or other player) most of the time to access them, it can be helpful if you can quickly locate the actual file—for example, if you want to copy it to your MP3 player. And that means you want a standard naming convention that you can count on.
Most high-level media applications, such as Windows Media Player, in fact, do have such a convention that they use when ripping tracks; and if you're satisfied with the convention, terrific. However, I find several weaknesses. (And of course, if you used SpeSoft or another app to rip, you will probably have similar, limited, choices.)
But just because your ripping app doesn't support the ideal naming convention is not a problem; you can always rename the files, as we'll see.
A good naming convention should allow you to identify the song quickly, and possibly the artist (especially in the case of a "Various Artists" album); it certainly must include the track number so the album can be easily listened to in order. Only a few, older, MP3 players use the file name, rather than the internal tags, to identify a song but the file name is what you'll see first.
Now of course you can always rename your audio files manually, by going into the folder and typing in new names.
This will get real old, real fast. What you want, if you are going to customarily rename freshly-ripped tracks, is an app that will do so automatically, based on the digital audio file's internal tags. There are dozens of such programs out there, but only one that I most recommend, both for its wealth of features, as well as for its totally reliable stability. It's called MP3tag. It's freeware and runs perfectly.
MP3tag's original purpose was to edit MP3 tags, which Windows Media Player also does well. However, MP3tag also shines at applying a naming standard, and it isn't limited to MP3s—it also works with WAV, FLAC, WMA, and M4A formats.
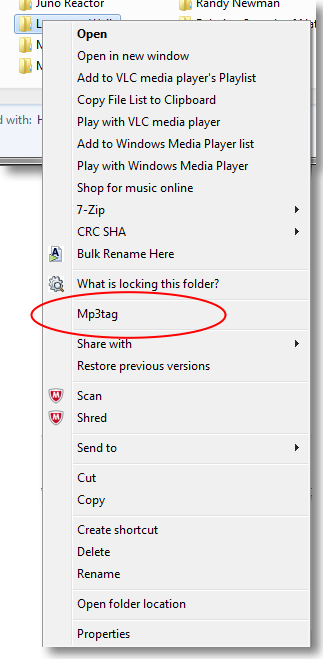
After MP3tag is installed, all you have to do is right-click any file in the folder you want to work with, and select MP3tag from the context menu:
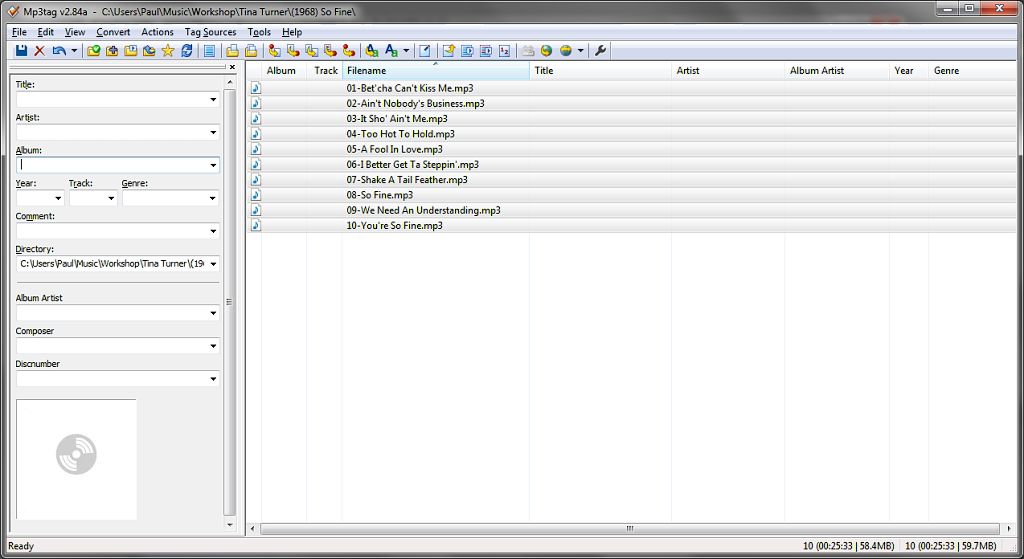
That will automatically open MP3tag and "position" it to this folder, automatically loading the tags from all the digital audio files in it, as well as any sub-folders. (In this example, the artist Lawrence Welk has several albums in it.)
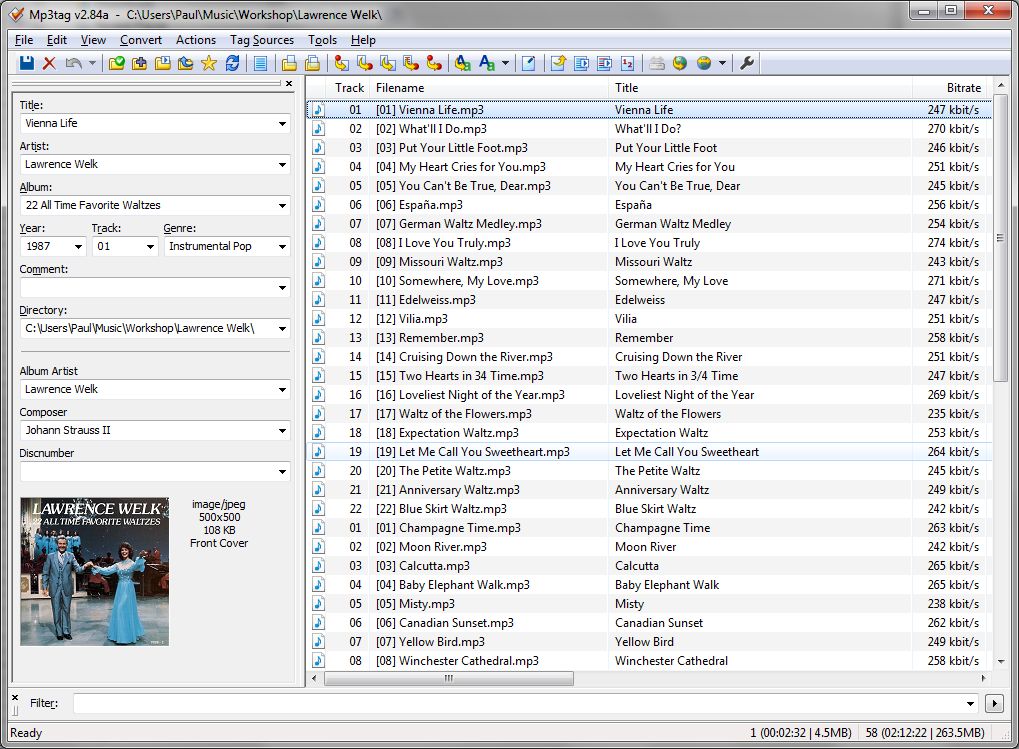
As you can see, the windows presents a lot of information…more than can be seen at once without scrolling, in fact. But this is partly my fault; by right-clicking on the column headers you can choose which tags you want to see. And by dragging, you can reorder columns; by clicking, you can sort by them. So your columns will not look like mine, unless and until you customize them yourself.
The panel at the left is called the Tag Panel and it can be turned off (from the View menu). It becomes populated when you select one or more tracks in the main panel.
Although MP3tag has a lot of abilities, within the context of this post, we are concerned with just two: Adding the correct tags to each file, and renaming them to our preferred standard.
Tagging

Tagging is the act of placing tags, or bits of information, within the very digital audio files themselves. This is possible because every digital audio file is structurally a container and what it contains is various types of data, besides the sound information itself. While not every player will use every, or even any, tags, most do and use them to great benefit, by allowing you to easily browse your music by author, genre, release date, or album or song title.
So you see, proper tagging at this step in creating your digital music library will save you a lot of time in the form of inefficient manual searches later.
There are a lot of possible tags. An infinite number, actually, since you can create custom tags! (Of course, few existing players will be able to do anything with your custom tag; but it'll be there!) You don't have to worry about any more than the few you can ever imagine yourself wanting to reference. (If a search on Composer will be important to you later, you'll want to be fastidious about providing that information now.)
But where will the information come from?
Some or all of it may be provided by your original ripping software. There are databases out there with every commercial CD, and even most vinyl, shellac, and tape releases as well. Modern rippers identify the CD from a code included in it and use that information to set the tags as the digital audio file is being created.
However…this works well, until it doesn't. Some rippers won't try to look up tracks; they can't look them up if the internet is unavilable; vinyl disks and tapes have no codes. Plus, there are a few mistakes in the databases which were, after all, compiled by humans. So you'll want to double-check.
So, with MP3tag open to the album you wish to work on, let's examine what tags are present, how to correct any that need it, and how to supply tags that are missing. To do this, I'll present several different scenarios (since I can't guess the source of the tracks you are tagging).
Lookup Tags Online
In our first scenario, the files (MP3s, in this case) came with no tags at all.
Now, if this album has been catalogued online, that will totally be the easiest means of populating the tags of each track. Has it been? The only way to find out is to try.
MP3tag provides access to several different online sources. Plus, the app is still being actively maintained (as of this posting) and the list of available databases changes periodically. My current first choice is MusicBrainz.

Notice that another choice is Cover Art. This is an alternate means of obtaining covers, but I generally get higher-quality results (as described under Organizing) from Google Images.
Anyway, since none of the tags are populated, the dialog box won't be, either. (If the Album name tag had already been provided, the dialog would have been filled in.)
Obviously the album name is required in order to look up anything.
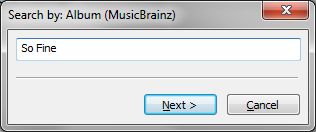
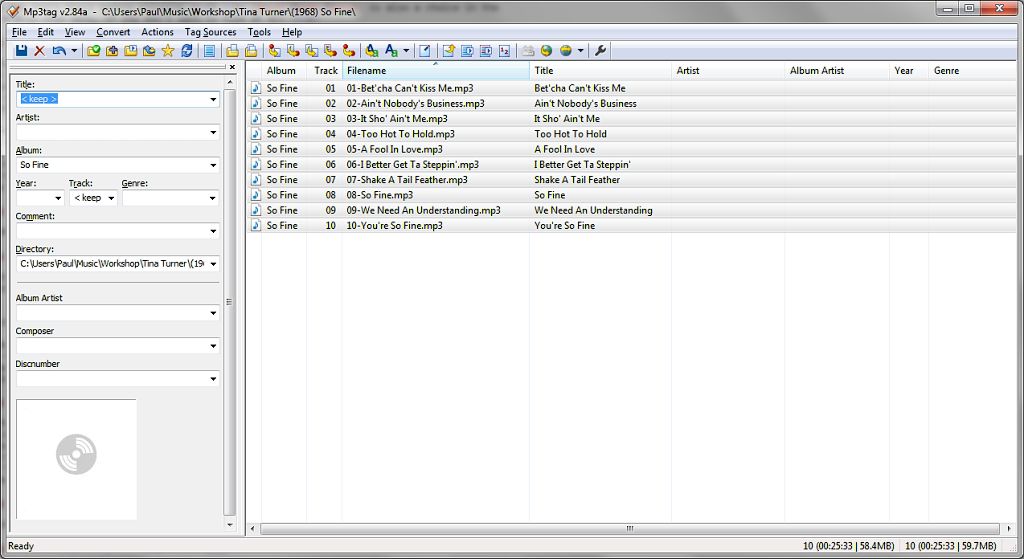
Clicking Next gives us potentially good news: There have been a number of albums catalogued under the name "So Fine". But we have to scroll down to find the one we want.
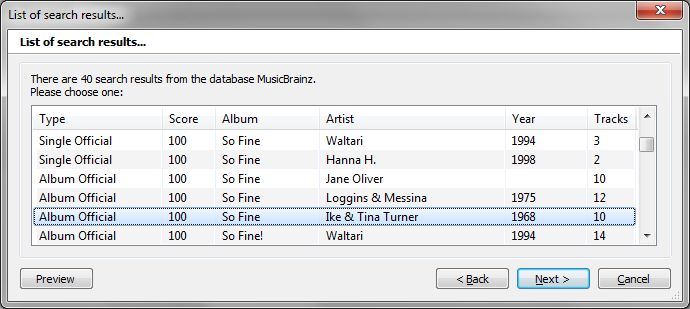
Clicking Next brings up the list of values from the database, cleverly compared to the files we want to tag (so we can check file name against track title, for example—which would be helpful unless your tracks are generally named: "Track 1", "Track 2", "Track 2", etc.).
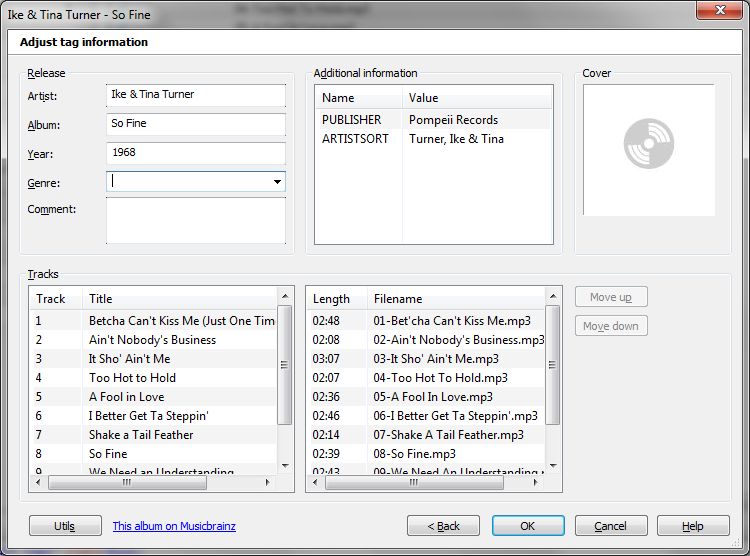
In this case, most of the info I want has been provided, with the exception of Genre. According to Wikipedia, this was an R&B album; so I'll just type "R&B" into the Genre field before clicking OK. ("R&B" is also a choice in the Genre drop-down menu, if you don't want to type at all.)
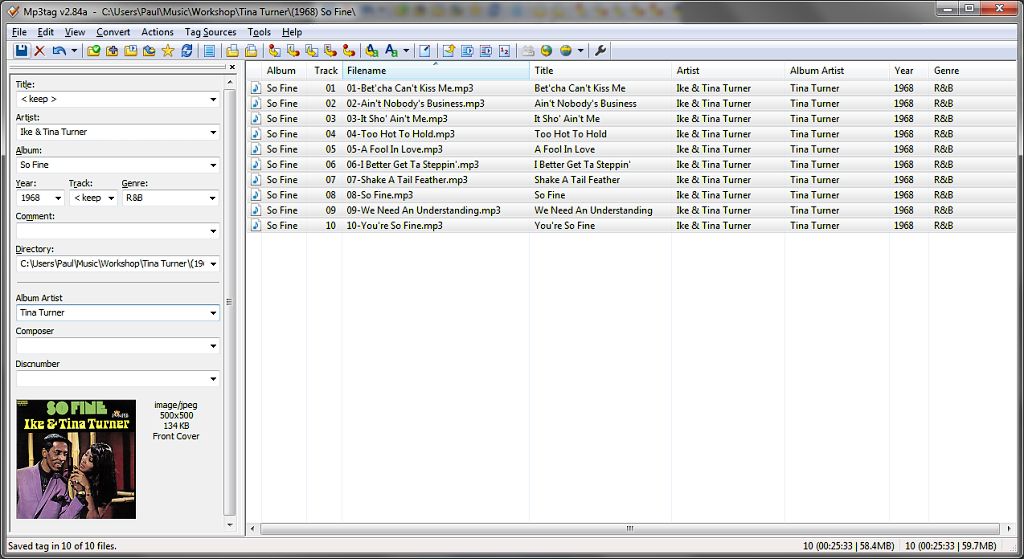
MusicBrainz has successfully provided, with almost no effort on my part, most of the tags I want. All that's missing is Album Artist. The value in this field should be the name of the artist who released the album. If it's a multi-artist compilation, the value should be "Various Artists". Otherwise, it's normally the same as the (Contributing) Artist supplied by MusicBrainz.
Howver, in this particular case, I want all Tina Turner's albums to use her as the Album Artist, whether she recorded them with Ike or not. (I didn't, personally, like Ike that much.) So that's the value I enter into the Album Artist field in the Tag Panel. And, at the same time, I can right-click on the Cover art square to add the art I've already downloaded from Google—fortunate, since MusicBrainz didn't have one on file for this album, anyway.
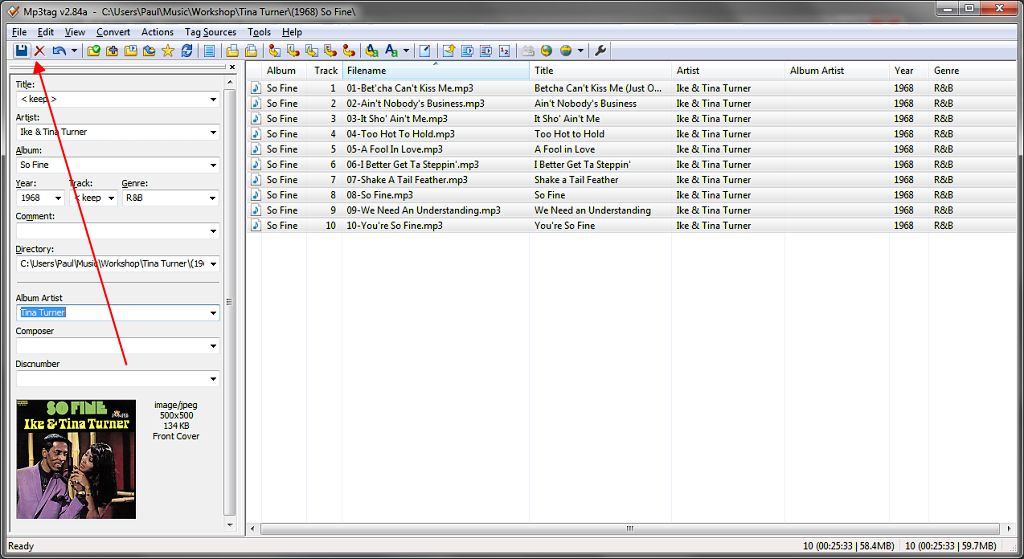
MP3tag will save the values you've specified when you click the Save icon in the left side of the toolbar.
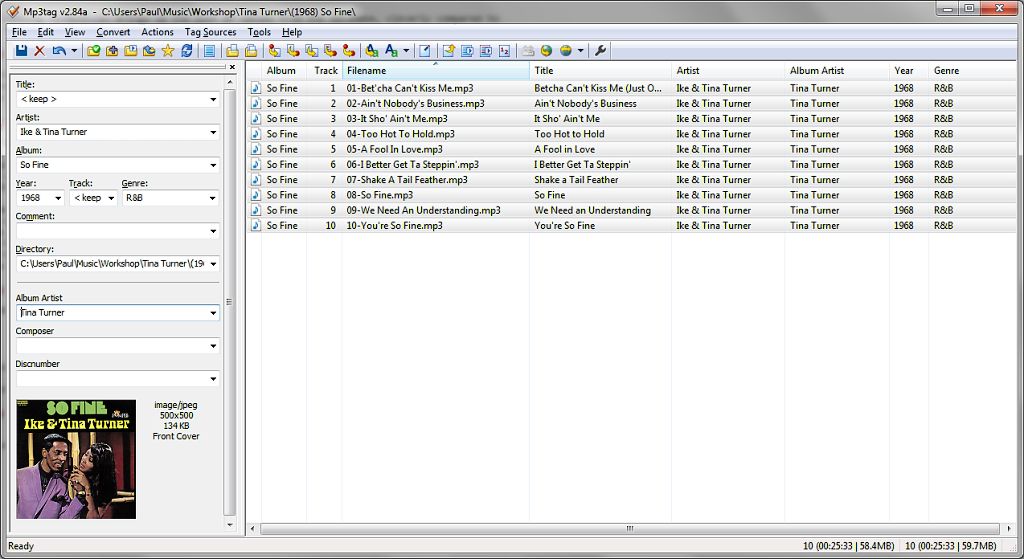
It's all tagged, and if you used your mouse to click, copy and paste, you didn't have to type a thing other than the album title!
Deriving Tags
But suppose MusicBrainz didn't have this album listed (and neither did anyone else), or I could see a conflict between the titles it proposed and the file names I already had. In that case, my best bet might be to derive as much information as possible from the filenames themselves, and then manually add the rest. This is done by selecting the Convert > Filename - Tag menu command.
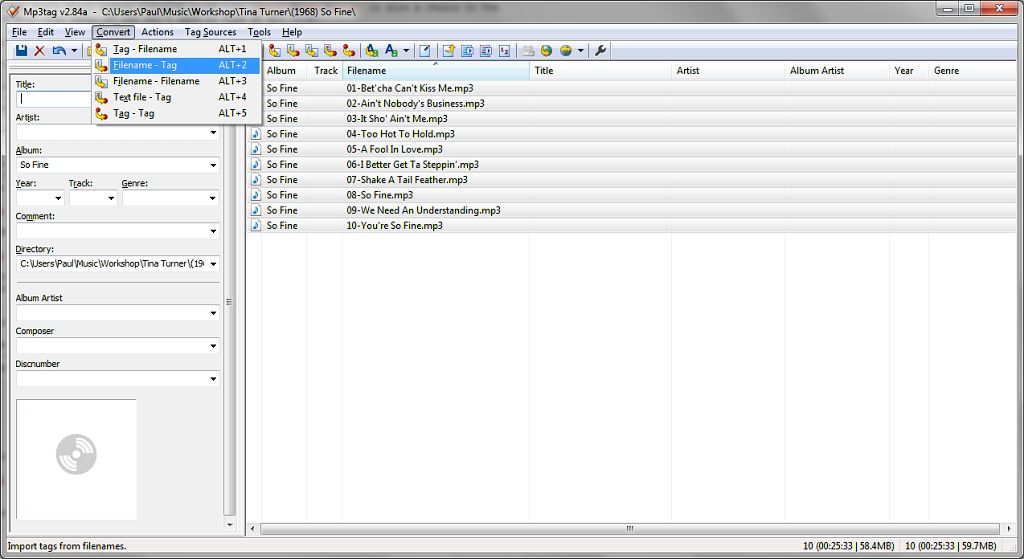
The resulting dialog includes a dropdown list of many possible "masks" that can be used to explain how the filename is formatted, so the desired tags can be extracted out of it. In this case, the filename contains only the track number and title. The mask to extract this format is simple enough that I just typed it in. The dialog presents an example of the result of the mask on the first of the selected tracks so that you can tweak the mask as needed.
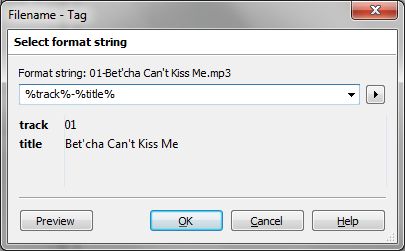
When you've got the mask working, clicking OK will apply the extracted values to the tags you requested.
The remaining tags must be provided manually.
Manual Tags
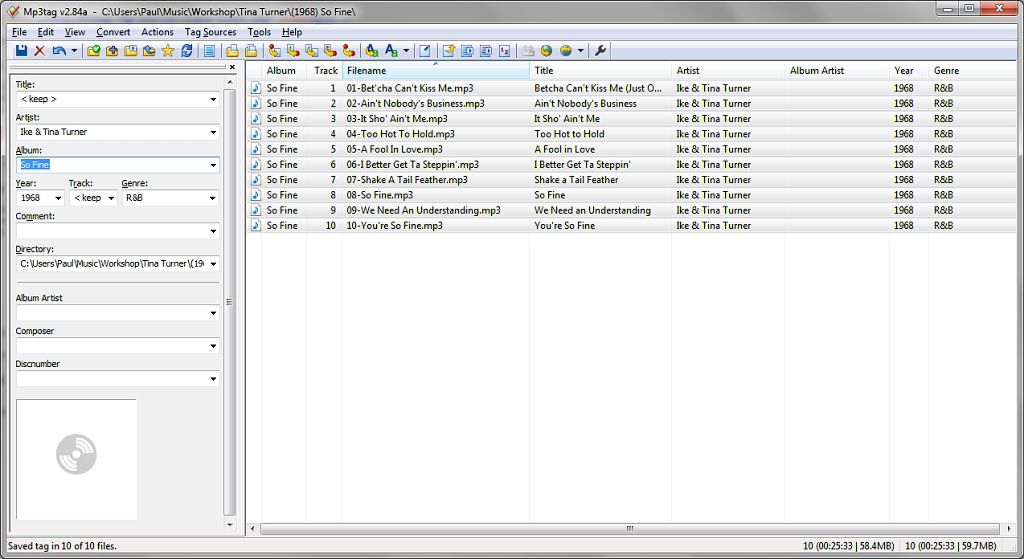
Although MP3tag allows you to type into each tag field (as if the album were presented as a speadsheet), when you have a lot of tags common to more than one track, it's a lot easier to select all the tracks (or as many as you wish to update) and use the Tag Panel at the left to change desired values all at once.
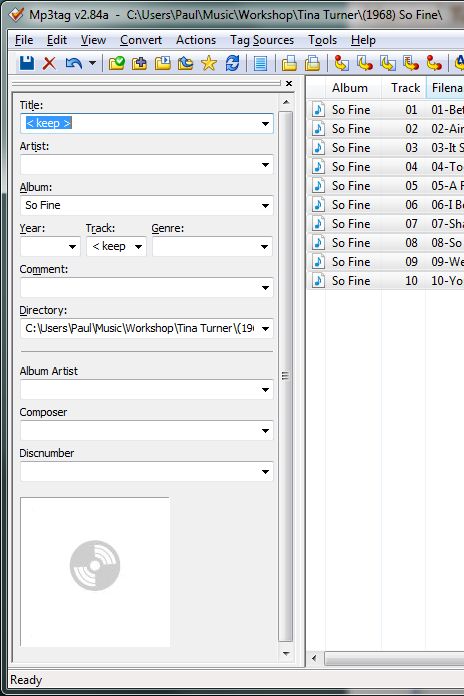
When you select multiple tracks, values that are common to all the selected tracks will be shown plainly in the panel (such as the Album in this example). Values that differ between the tracks (in this example, the Track and Title) will contain the value <keep>. You can change the choice to <blank> if you want to clear it from all selected tracks. Or, you can type in (or paste) any value you like; it will then be applied to all selected tracks when you click the Save icon.
Tweaking Tags
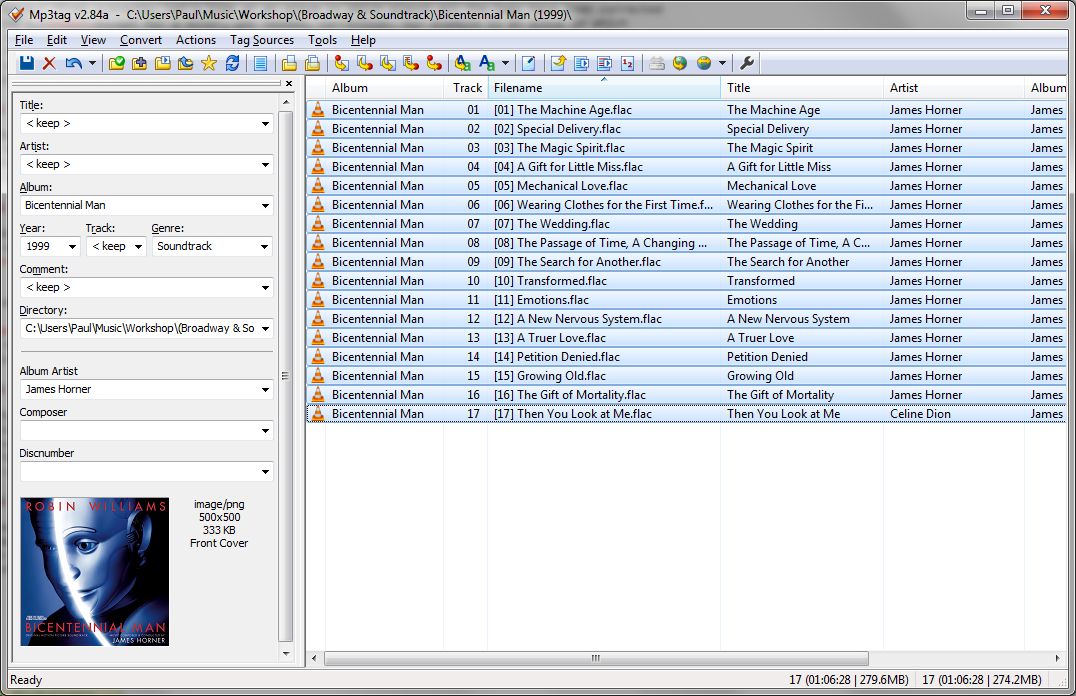
For our final scenario, let's look at an album in which almost all the tags have been corrected filled out—except for a minor, yet needed, correction. Our example is an album in which one artist has performed all the songs but one. Specifically, I'm looking at the soundtrack album for the film Bicentennial Man, by prolific film composer James Horner. All of the tracks but one are orchestral pieces; as conductor of a nameless studio orchestra he gets listed as Artist (and Album Artist) as you can see in the screen grab below.
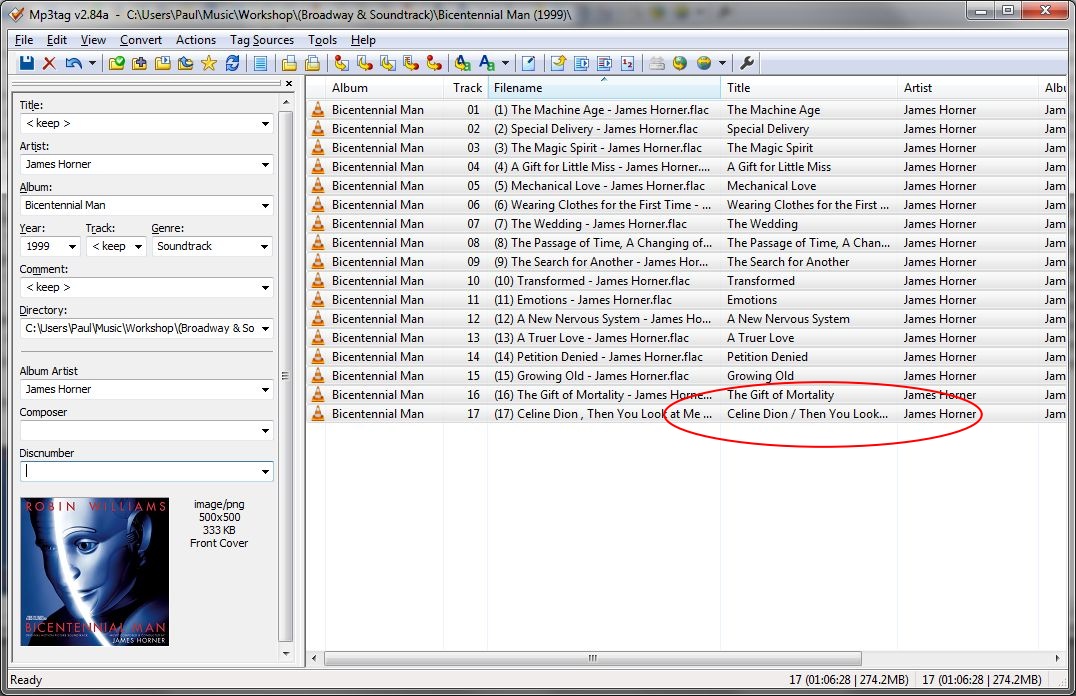
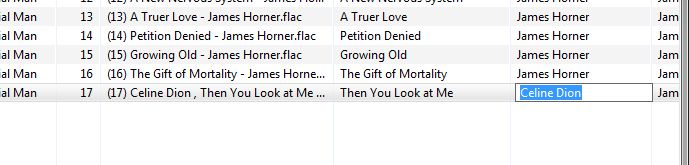
But if you look closely at the bottom entry, you'll see that a guest Artist (Celine Dion) had her name attached to the track Title. There's only the one, so a manual change to the two tags (removing her name from Title and placing it in Artist)—which you can do with the mouse and cutting-and-pasting—will do the trick.
So, at this point, you should have all the tracks in your album properly tagged; and all that's left to do is used that tag information to rename your files to your preferred standard.
Renaming
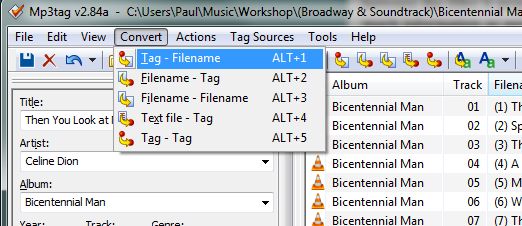
…Which brings us to the final big thing that MP3tag will do for us: Use the tag information to create a usable and useful name for the actual file. Like deriving tags, this is done from the Convert menu.
My naming convention starts with the Track within square brackets, followed by the Title and, optionally, the contributing Artist (especially in a Various Artists album). If the Artist is included, I also put that in square brackets. That pattern for this must be typed into the Tag - Filename dialog. (Or selected from the drop-down list, where you'll find each pattern you've previously used.)
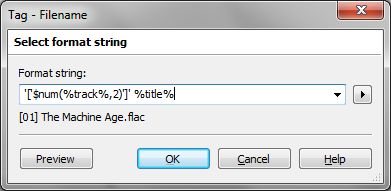
As you can see, not only do you have access to tags, but also rudimentary functions to do things like adding a leading zero to the Track if there are fewer than, say, two digits. When you have the pattern working (you can see the proposed results in the dialog box), click OK and your files will be renamed.